Camping might not be for everyone, but indoor camping with the kids should definitely be an exception if you are camping averse. In this article I will share with you some fun indoor camping ideas for kids that are great for a rainy day/night.
And I’ll also explain the learning benefits that arise out of this kind of pretend play activity!
You can make indoor camping as simple and budget friendly as you would like, or you can turn it into an extravagant event.
If you home school or have a home based daycare, you could set up a camping area in your house and keep it there for several weeks, targeting different areas of language development and learning during that time.
Theme based learning is a great way for kids to gain new vocabulary and skills.
Indoor Camping Ideas For Kids – Learn and Play at the Same Time!
This post contains affiliate links. This means that if you make a purchase through one of the links I will receive a small commission (at no cost to you). Thanks for your support!
Here are some items you will need for your indoor camping experience!
SHELTER
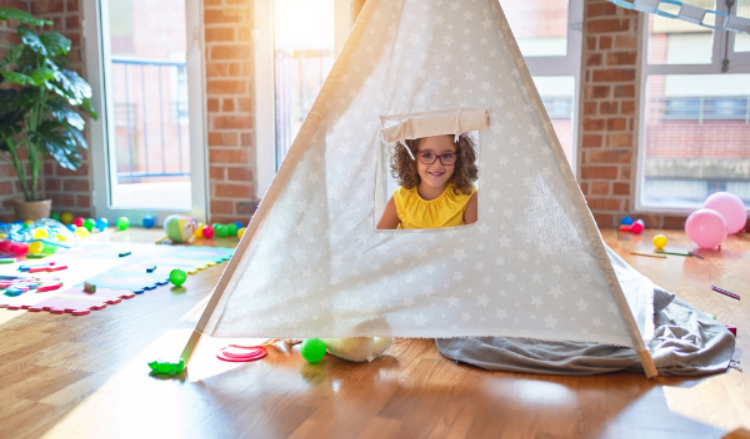
You can either make your own fort using blankets and chairs or use a kids tent or teepee.
But be prepared for some collapsing if you are making your own fort.
You can also purchase some adorable cloth “cabins” and teepees that make a nice alternative to the DIY tent.
These are great because children can use them for anything they come up with, their use is not limited to only camping!
Learning Opportunities (Shelter)
If you have chosen to build your own tent/fort, talk to your child about what supplies would be needed.
How you go about this will vary depending on the age of your child.
If you are using a pre-made tent or cabin, you can talk about the steps involved in setting these up.
Keep in mind that the above teepee and cabin are not “pop up” style.
This means you have to assemble them and take them apart.
These are meant to become part of your child’s play area.
Once the shelter is set up, you can work on the following:
♦ Vocabulary
Tent, camper, fort, shelter, door, wheels, windows, curtains, blankets (pretty much anything to do with the shelter)
♦ Prepositions
In, out, on, under, in front, behind, around
♦ Opposites/Descriptive Words
Warm/cold, wet/dry, big/little
♦ Talk about why shelter is important
This would be more for older children, but can still be done with younger ones depending on their language level.
Discuss why we need shelter when we go camping and what might happen if you just went outside and slept on the grass.
You may be surprised at the answers your children will give you.
CAMPFIRE
What camping trip is complete without a campfire?
You can make your own pretend campfire following the steps below, or you can purchase a cute ready made one such as the one in the picture.
If you want a more realistic campfire that will light up, place some LED tealights in it.
These can be purchased at most dollar stores.
Make Your Own Campfire:
Supplies needed:
♦ brown and black construction paper
♦ yellow, red, orange tissue paper
♦ pool noodle (optional)
♦ glue/tape
♦ LED tea lights
Simply roll the brown construction paper into “logs”.
Tape or glue them so the don’t come apart.
If you are able to get some pool noodles (thin ones, not too thick) they would help to make the logs sturdier.
Cut the pool noodle into about 4–6 logs and then wrap the brown construction paper around them.
Secure with tape or glue.
Next fold/crumple the tissue paper to make flames.
Last scrunch up the black construction paper to form rocks.
Once you have all of the fire parts made, assemble them into a campfire.
Place the LED tea lights in between the logs and flames.
Learning Opportunities (Campfire)
Talk about why you would need a fire when camping (cooking, warmth, providing light).
Discuss fire safety – if your children are over the age of 3 include “stop, drop and roll“.
Talk about the kinds of food you could make using a campfire.
♦ Vocabulary
Fire, sticks, wood, rocks, flames
♦ Opposites/descriptive words
Hot/cold, bright, light/dark
♦ Colors
Red, yellow, orange, brown, black
CAMPING SNACKS
There are so many foods that you can make while camping (indoors or outdoors).
This would become a very long article if I talked about all of them, so instead I will discuss the campfire classic – S’mores!
Here are 2 quick ways that you can make s’mores at home without needing a real campfire.
S’mores Microwave Method
Ingredients:
Graham crackers
Marshmallows (large)
Chocolate pieces (chocolate chips work well)
Directions (for one s’more):
- Place a graham cracker on a microwave safe plate or paper towel
- Put a few chocolate chips or a piece of chocolate on the graham cracker
- Put one marshmallow on top of the chocolate and graham cracker
- Microwave for 15–20 seconds (watch it carefully so the marshmallow melts but doesn’t explode)
- Take the plate out of the microwave and place another graham cracker on top of the one with the melted marshmallow/chocolate
- Wait for it to cool down a bit before eating. Enjoy!
S’mores Oven Method 1
Ingredients:
Waffle cones
Mini marshmallows
Chocolate chips
Directions:
Place marshmallows and chocolate chips into the waffle cone (about 1/2 to 3/4 full).
Then wrap the cone in tinfoil.
In order to prevent the marshmallows from sticking to the tinfoil you can try placing some parchment paper on top of the cone prior to wrapping with tinfoil.
Place the wrapped cone on a cookie sheet and bake at 375 degrees for about 8–12 minutes (flip the cone over at the halfway mark).
Be careful, it will be very hot when you take it out! You can place more than one cone on a cookie sheet.
S’mores Oven Method 2
Ingredients:
Butter
Chocolate Chips
Mini Marshmallows or large marshmallows cut in half (horizontally)
Graham Crackers
Directions:
Preheat oven to 450F with a cast iron skillet inside.
Once hot, carefully remove the skillet and coat evenly with butter.
Next add a layer of chocolate chips.
Finally top with mini marshmallows or the halved large marshmallows.
Place the pan back into the over and bake for about 5 to 7 minutes (until marshmallows are golden brown on top).
Allow to cool for a few minutes before serving.
Use the graham crackers to scoop up the ooey gooey melted chocolate and marshmallows!
Learning Opportunities (Campfire Foods)
Come up with a list of all the foods that could be taken on a camping trip (your child can write these down).
Gather up all your play food to bring along on your indoor camping adventure.
Talk about foods that would need to be kept cold and which ones don’t.
If your child is old enough have them help you make the s’mores.
You can give them the steps that they need to follow which is a natural way to work on following (and giving) directions.
CAMPING EXTRAS
Some additional camping items you may want to include are:
- sleeping bags
- pillows
- air mattresses (if the parents will be sleeping on the floor, kids don’t seem to mind being directly on the floor)
- flashlights
- pretend fishing set
When Will You Go On An Indoor Camping?
Setting up an indoor camping trip doesn’t need to be complicated.
If you are a DIYer you can make most of the items discussed yourself.
Or check out this article for some wonderful pretend camping toys for kids that I have hand selected!
I hope that you have enjoyed these indoor camping ideas for kids and have realized how simple it is for children to learn a great deal while they are playing!
Have you done any indoor camping with your kids? If not, what is holding you back?